Neocities environment with Github + actions
A beginner-friendly guide
I've been introduced to Neocities recently (thank you lazyarsonist and I'm really into it. I understand its essence, but I really think code versioning and getting to write html on an IDE instead of a browser's iframe could improve it even further, so I'm writing this article to help you setup an environment that will save you some minutes.
Git repository
First of all, you need to set up a Github repository to provide easy versioning. Head to Github, create an account, and then create a repository. After creating it, clone the repository to your computer.
VSCode
You will also need an IDE to see your changes in real-time instead of waiting neocities to refresh your page. I recommend VSCode. It is lightweight and allows a lot of extensions. Download it here.
Now, open your Github repository in VScode: File -> Open folder...
Moving your existing Neocities site to the repo
Neocities allows you to download your entire website as a .zip file. We will leverage this to put all the files at once in the repository folder. Go to the Neocities dashboard and click Download the entire site (or simply click here).
Go to your repository folder on your computer and create a folder named "public". Then, extract the .zip file content inside this "public" folder.
Live Server extension
This VSCode extensions automatically refreshes the page every time you change it. No need to
F5 or wait for neocities.
To install it, click the 'Extensions' icon in VSCode (located in the left sidebar, represented by the
squares icon)
Search for 'Live Server' and click install.
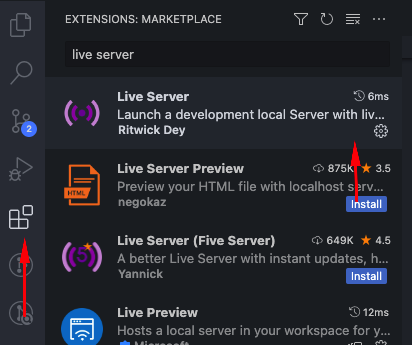
Then you can click the 'Go Live' button on the bottom-right corner of your VScode and your index page will open on a browser.
Setup the Deploy action
Now, inside the repository folder (but outside of the public folder), create a folder called
.github . Inside it, create a folder called workflows .
You may need to perform these steps through VSCode because finder and explorer default behavior is to
hide
files and folder that starts with a dot on the name.
Inside the workflows folder, create a file named neocities.yaml with the following content:
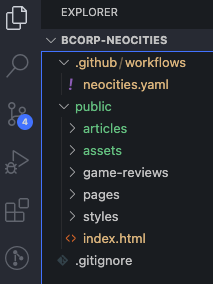
After setting everything up, you should have a folder hierarchy that looks like this:
Now you need to safely store your neocities API key on Github, so it can update the files everytime you change something.
Go to: https://neocities.org/settings/{{your-sitename}}#api_key
Click on Generate API Key and copy it.
Now, follow
this tutorial on github secrets
to create a repository secret containing the API Key you copied on the previous step.
The name must be NEOCITIES_API_TOKEN. (or the same name you used on the .yaml file)
Commit and validate
At the bottom of your VSCode, you have the integrated terminal. If you don't have git installed,
you can follow
these steps
for your OS.
Also, if any configuration is asked (or if you want to learn more about git), you can refer to
this text.
After installing it, go to the terminal on your VSCode. Make sure the current directory is the
repository folder. Now, you will type the following:
git add . to "stage" all the files for a commit. Then,
git commit -m "a commit message" where the commit message can be anything you want. Usually, we write something related to the changes we made to the repository. You can use "adding the site", for example. Now, type:
git push To send your commit to the remote repository on github. If everything went fine, your code is now stored in your Github repository.
You can go to your Github repository page and navigate to the "Actions" tab. Here you will be able to
see the "deploy" action executed:
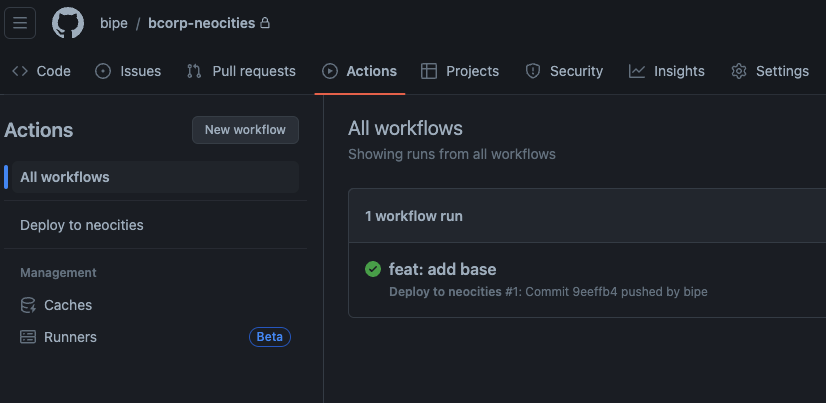
If it is green, your site is updated :)
Reference:
Deploy to Neocities Action